Saturday, May 7, 2011

2011 Guide to Lincoln, Nebraska Farmer's Markets and Farms

Photo Credit
It finally looks like winter decided to disappear and summer is fast approaching and with summer the local farmer's markets and farms are gearing up to start selling their goods.  Seeing we live in an agriculture state Lincoln is abuzz starting this Saturday with loads of locations where you can purchase goods from local growers.  This week I'll go through the markets, farms and CSAs (Community Supported Agriculture) in and around Lincoln, Nebraska.


Farmer's Markets

Haymarket Farmer's Market - Runs May 7th through Oct. 15th.
Located on 7th & P streets,
Time: 8-12 p.m. n oSaturdays.
This is the biggest one in Lincoln with roughly 120 vendors on any given Saturday.
Website: http://lincolnhaymarket.org/events/farmers-market/

Centennial Mall Garden Market - Runs July 6th through Aug. 31st.
Located on L street between 14th and 16th streets.
Time: 12-4 p.m. on Wednesdays

Old Cheney Road Farmer's Market - Now until Oct. 30th.
Located at 5500 Old Cheney Road
Time: 10-2 p.m. on Sundays
Website: http://www.oldcheneyroadfarmersmarket.com/


Jazz in June Market - June 7, 14, 21, 28
Located at 12th and T streets
Time: 5-7 p.m. Tuesdays
Offers live music, food, vendors, and local artisans.
Website: http://jazzinjune.com/ 


Fallbrook Farmer's Market - Begins June 16th
Located at NW 6th St. and Fallbrook Blvd.
Time: 3:30-7:30 p.m. Thursdays


UPCO Community Market - Runs June 15th through Sept. 21st.
Located at 48th and Madison streets
Time: 3-6 p.m. on Wednesdays

Farmer's Market at the FARM - Runs May 21st through Oct. 29th.
Located at 11855 Yankee Hill Road
Time: 9-Noon on Saturdays


St. Paul UCC Farmer's Market - Runs June 7th through Oct. 11th.
Located at St. Paul United Church of Christ - 1302 F St.
Times: 4:30-7:30 p.m. on Tuesdays

Piedmont Farmer's Market - Runs May 14th to mid-September
Located on 1265 S. Cotner Blvd.
Time: 8-noon on Saturdays

Farms/Orchards


Page's Produce
Growing fruits, vegetables, and flowers at 2455 County Road A, Valparaiso. They have a roadside store and also attend the Old Cheney Farmer's Market.  They concentrate on sweet corn, tomatoes, apples and peaches.

Martin's Hillside Orchard
A U-pick orchard in Ceresco with raspberries, apples, cider, & pumpkins.  Tours and butterfly garden.
Website: http://www.hillside-orchard.com/

Darby Springs Farm - Ceresco
Sells free-range eggs, heritage chicken, milk, butter, and more.

Branched Oak Farm - Raymond
Produces milk for a variety of cheeses (Quark, Camembert, Gouda, Mozzeralla, Cheese Curd, Seasonal selections.
Hours: Store is open 11-6 p.m. Tuesdays and Saturdays
Website: http://www.branchedoakfarm.com/

Common Good Farm - Raymond
Located: 1702 NW 40th St., north of Raymond
They offer 45 kinds of produce, herbs, & meats.  They offer a CSA program as well as offer their products at an on-site store.
Website: http://www.commongoodfarm.com/

Sunwest Farms
Located: 4851 N. 84th St.
Phone: 402-466-7022
Website: http://www.sunwestfarms.blogspot.com/

Chrisholm Family Farm - Elmwood
Offers products on sale at the farm.
Open daily, 7 a.m - 7 p.m.
Website: http://www.chisholmfamilyfarm.com/

ShadowBrook Farm
Located: 2201 W. Denton Road
Market-style CSA.
Website: http://www.shadowbrk.com/

West Blue Farm - Milford
Offers chicken, lamb, and beef products without antibiotics nor growth hormones.
Website: http://www.westbluefarm.com

Thursday, May 5, 2011

Chicken Stocks Smell Good

The remnants of chicken and an interesting book.
In the last posting here we made a chicken, brined it, roasted it, consumed it, fed it to ours rats or other various pets and then we got yelled at by the wife or husband for leaving carrot shavings in the sink overnight and cooking to much fatty food.  There were also bones, anywhere from 2-3 whole pounds of bones depending on the size of the bird and what I didn't feed to my pet rats I saved to make one of the most basic components of cooking, stock.  Good stock beats the pants off of anything that you can buy at the store.  Not only does it lend a nice aroma to your house during the 4-5 hour process of making it, but it is the foundation of so many dishes from risotto to sauces to soups. Today I'm going to run you through a fairly basic stock with a little help from Michael Ruhlman's Ratio.

As you can see by the title of the book we are going to use a ratio here to make our stock, 3-2.  Simply, it is 3 parts water to 2 parts bone.  I had 2 pounds of chicken bones left, so I used 3 pounds of water (6 cups) to produce it.   The rest of the ingredients were as follows:

Almost done, 1 more hour.
1/2 pound onion (I used 1/4 pd. leeks & 1/4 pd. onions)
1/4 pound celery
1/4 pound carrot
4 cloves of garlic
1 bay leaf
1 tsp. of black peppercorns (crushed of course, you can also roast them a bit first)
3 sprigs or so of thyme
small bundle of parsley

Once you have your chicken bones and COLD water in the pot bring you temperature up to just below a simmer (180 F) then drop the temp to low, skim the congealed junk (proteins and foam) off the top, and let that baby sit for 4 hours or so.   During the last hour of cooking add the remaining ingredients listed above to finish the stock. Additions will cool the stock so, bring back to a simmer then reduce the heat to low again and give it another 45-60 minutes to steep.
Not just for hair or hippies.

Finally, remove the large pieces of bone and discard, run the stock through a fine mesh strainer or chinoise then repeat the process again through some cheese cloth. For some bizarre reason I can not find cheesecloth in Lincoln, NE so, I just use a bandanna that I stole from my wife, she wasn't happy but it works just fine and I can simply wash it.  Throw the freshly strained stock in the fridge to cool and store.  It will keep for 7 days in the fridge and a month or so in the freezer.  Be careful not to keep around onions or other things that will impart odors on the stock because it will pick them up.

There ya have it, either store in a ziplock bag or nice sealable tupperware and you have yourself roughly 4 cups of chicken stock to use on whatever your heart desires.  My wife used it immediately after I made it for some mad wive's breakfast risotto.  Till next time.


I was going to use you for leek soup, but...

Wednesday, April 27, 2011

Brine that Chicken and Roast Roast Roast!

Cluck!
Chicken, that versatile, oft genetically enhanced fowl, rotting away in cramped quarters before they are strapped down, electrocuted then beheaded. Mmmmm. Sorry for the visual, but it is the reality of our mass produced food system in this country.  Cruelty and absurdness aside it is the protein that seems to find its way onto American dinner plates more often than not. I love it, not the process it took to get to my kitchen, but the fact that it is something of a tabula rasa of the protein world.  It can be prepared an ungodly amount of ways, with pretty much any flavor combination that our little minds can dream up.  Escoffier, I believe it was him, went as far as saying that the stock derived, be it chicken, veggie, etc. is the canvas from which a chef works upon to layer and build, yadda yadda yadda. So, without further ado I direct you to Michael Ruhlman's simple lemon-herb brine and a little tutorial on how I go about cooking my birds, with a little help from a few links and a video or two.

First the brine:
 Lemon/Herb Brine Components 
Not many things taste better than a chicken that has soaked in a brine for 8-12 hours, nor are many things that moist. It works great for roasting the bird, and it is even better for frying the bird due to the abbreviated cooking time involved. Speaking of abbreviated times, I got the urge to roast myself a bird last evening at about 5 o.m. and realized that I would have to speed this process up a bit.  If you go over to Michael Ruhlman's blog, he has a great article on shortening the brining time by amping up the salt/water ratio to about a 10% salt ratio, which is normally about a 5% salt concentration. In short, you are using 100 grams of salt to 1000 grams (1 liter) of water. For those that don't use the metric system your measuring cup has liters on it, and you really really really need to invest in a scale.  I use this low-end Salter model and it works just fine. In addition you can get some more info on basic brining concentrations, ratios, and tips from Cook's Illustrated here.

If you wouldn't hurt me I would drink you.
Due to my inability to understand copyright issues I'm not going to repost the recipe for the brine here, but you can see the components above here and gather what you might need (Just go to Ruhlman's blog)  That pretty fresh green leaf is sage, but you could substitute thyme, rosemary, tarragon, marjoram, or whatever your heart desires.  Sage is just my favorite with chicken.  What you do is add all of those above ingredients into a pot with 500g (1/2 liter) and bring it to a boil, once boiling remove from heat and cover for 10 minutes. After 10 minutes you will pour the mixture over 500g of ice (Your scale comes in handy here) to cool the mix quickly to a usable temperature.  Once all of the ice is melted you can stick your chicken in a seal-able bag and let rest at room temperature for 2-3 hours.  When you hit the 2-3 hour mark, pull your chicken out, discard your remnants and pat the chicken dry and let the chicken sit for another hour at room temperature to let the salt and juices redistribute themselves evenly through the bird.  Next, trussing...

There are many ways to truss a bird and you may already know how, but after some searching on variations I came across Brian Polcyn's method, which instantly became my favorite for its simplicity, yet ability to really tighten everything up nicely.  He even has a nice video, left, to walk you right through it. So you've watched the video and you understand the trussing concept, let's hold off on tying her/him up and figure out how we can dress this bird up for success while it cooks.


Sorry for the ugly photo.
My roasting pan became the victim of one to many bizarre broiling attempts so I had to use a makeshift one yesterday, but it worked fine.  You can either use a metal rack or a natural base to raise the bird from the pan. The reason we do this is to allow proper air circulation, which helps us in even cooking.  For the natural base I use a rough large chop mirepoix (celery, carrots, onions) to add some aromatics to the party.  While we are chopping up our base we should also make a small rough chop mirepoix to use to stuff the bird with as well. In addition to the veggies you can give it a nice shower of Kosher Salt and cracked black pepper (about a tablespoon of each). I added a bit more because my wife can't stand the skin and I love mine over-salted. Last night I also had some compound butter with roasted garlic in it that I rubbed between the skin and the meat.  It is pretty simple to do such, just run your hand between the skin and the meat, carefully separating it and watching not to tear. One of the pitfalls of doing this is the butter will create steam, which is something you do not want when roasting the bird. Since I don't advocate putting any liquid in the bottom of the pan the effects seem to be negligible, and I haven't had much problem losing moisture in the finished product.

Ooo blurry bird you will get a new camera soon.
To cook, crank your oven up to 450 degrees F and when ready, stick her/him in.  Now, I'm sure that you've seen recipes that say cook the bird at 375 degrees F, but this is just too low.  You want heat here and the slow cooking will dry you out.  Make sure you have your trusty thermometer on hand and take the time to check your temps in the thickest part of the the thigh, taking care not to hit any bones with the probe.  When you have reached 175 degrees F pull the bird and let it sit for 15 minutes to redistribute the juices evenly throughout as well as carry over the cooking.  Carve, enjoy, unbuckle your belt then sit on the couch with your hands in your pants, you deserve a rest.

Sunday, April 24, 2011

Umm, Happy Easter?

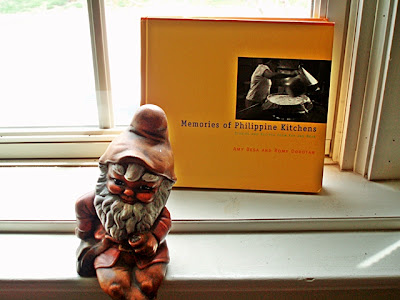
"Memories of Philippine Kitchens"
While I'm not too happy that I don't get to work today as it hurts the ol' pocket book, I am happy about the awesome weekend I had.  I got to hang out outside all day yesterday selling sandwiches and hot dogs at Earth Day Omaha. I got to serve a bunch of cool local chef's, amongst them Clayton Chapman who owns The Grey Plume in Omaha, an awesome restaurant that does everything farm to table. (I also found out that a guy I worked with years ago back in Minnesota cooking breakfast for the Polka crowd at a little pub is his sous chef.)

I also received a fun cookbook in the mail.  "Memories of Philippine Kitchens" is written by Amy Besa and Romy Dorotan, owners of Purple Yam, in Brooklyn.  What drew me to this book is one, my wife is Filipino and her Mama cooks some amazing home dishes, and two, it actually goes through the history of the Filipino food as it is has multiple influences due to Spanish occupation and the Chinese influence as well.  From flipping through the book quickly it seems to distinguish between indigenous and externally influenced food, has about 10 different recipes for adobo (which is THE quintessential Filipino dish) and over 100 other dishes that fit in the professional kitchen as well as at home.

My favorite part, and this comes from my Mother-in-Law's approach to her cooking, is that Besa advocates finding what works for you by using your own measurements and your own sense of balance.  She literally has recipes in here that simply say, "Here are your ingredients, have at it."  This can be tricky with Filipino food due to the common acidic elements involved in many dishes from all of the vinegar used. Once balance is achieved though you can really tailor everything you do to what you enjoy.  I remember the first time I went to my In-Law's house and asked my Mama-in-law to let me help her in the kitchen. She first put me to work rolling lumpia then just went at making pancit right off the top of her head.  I asked her for the recipe and she just laughed and said, "Watch."

The best part is, I can't replicate it, but I can make it my own. This is why this book has me so excited.

Friday, April 22, 2011

You are the Falafel of my Eye

I'm thinking of you...
Ok, I woke this morning and all I could think about were sultry balls of mushed up chickpeas, deep fried, and stuffed into a warm pita with a cucumber dill yogurt sauce. I wasn't thinking about the dreary day outside, the impending 12 hour shift and the ridiculous weekend I am about to have with Earth Day Omaha , I was thinking about those warm falafel balls, crunchy with that mushy inside.  So here is a quick recipe for some easy falafel, yet they have a good kick of flavor to them. See, even my little rat Nom-Nom loves these falafel.
Nom Nom, Falafel!


What you need:

1 cup dry chickpeas (You can use the canned junk, but your texture will be much better if you use dried beans that you've soaked the night before.)
1 small onion
5 cloves of garlic
1/2 cup fresh cilantro (chopped)  - (I go a little lighter on the cilantro to fit personal taste.)
1//2 cup fresh parsley (chopped)
1 teaspoon baking powder
6 tablespoons flour
2 teaspoons cumin (I use fresh seeds ground)
1 teaspoon kosher salt
1 teaspoon coriander (ground)
pinch of cayenne pepper
Splash of lemon juice

What you do:

  • In a food processor or by hand finely chop the onion, garlic, parsley, and cilantro.  Add chickpeas.
  • Transfer to a large bowl and mix in spices and splash of lemon juice.
  • Once everything is incorporated add flour and baking powder and mix well.
  • Cover with saran wrap tightly and put in the fridge for 2 hours to set (You can get away with 1 hour, but what you're looking for here is a nice set to the mix so your balls stick together well.) 
  • After you have stood glaring in contempt at the fridge for two hours or whatever you do when you wait, form the falafel balls.  It is key to keep a good, small size, about the size of a golf ball to ensure you heat the product all of the way through.
We are done!
  • Heat your oil to 350 degrees and fry them off in small batches, until golden brown.
  • Removing to a plate with a paper towel to drain.  


For the Cucumber/Dill Yogurt Sauce

6 ounces of PLAIN yogurt (I use soy yogurts, so there is a subtle taste difference.)
1/2 cup cucumber (peeled, seeded, & finely diced.)
1 or 2 teaspoon of fresh dill weed (You can substitute the dry stuff, but, meh, go buy the fresh stuff. This doesn't keep for more than a day really.)
salt and pepper to taste

Mix this jazz together for a simple sauce.

So, there ya have it.  2 hour quick falafel that will kick the pants off your palette.  That, or bug the eyes out of your pet rat.
Eating her salad!

Thursday, April 21, 2011

Poached Salmon with Bourbon and Maple

So, I thought I'd share a recipe that we made at school the other day.  It is kind of hard right at the moment to really share what we are doing as the only lab class I have is Foundations, and honestly I don't think I need to tell you have to cook eggs or make a salad, nor is any of the stuff we are working on particularly, well, delicious. But I had to share this poached salmon with a bourbon-maple reduction that blew the brain clear from my skull, where it ended up somewhere amongst the fluorescent lights and the ceiling, dripping on my now frightened classmates.  Something about the flavor pairing with the shallots and the bourbon-maple just works.  I've never poached salmon before and we did two dishes last week, the other, a Salmon Confit that was edible, but this piece turned out with a much better texture.  I am not sure if the texture derived from a full immersion in oil is something that my tongue wants to know. I might share that later, but for now make this and put it on a salad. Your salad will get off the plate, slap you a high-five, and leap towards its demise.


Poached Salmon with Bourbon and Maple

Ingredients:

1 lemon
2 tablespoons bourbon or brandy
3 tablespoons maple syrup
2 tablespoons whole grain mustard
1 tablespoon cider vinegar
1 medium shallot, sliced thin (about 3 tablespoons)
3/4 cup water
4 center-cut skinless salmon fillets, 6 to 8 ounces each
1 tablespoon unsalted butter
1 tablespoon chopped chives

Method:
1.       Cut lemon into eight to ten 1/4-inch-thick slices. Arrange lemon slices in single layer across bottom of a skillet, 12 inch works well. Whisk bourbon, maple syrup, mustard, vinegar, and shallot together in small bowl. Add bourbon mixture and water to skillet.
2.       Place salmon fillets, skinned-side down, on top of lemon slices (to prevent salmon from coming into direct contact with bottom of pan). Set pan over high heat and bring liquid to simmer. Reduce heat to low, cover, and cook 11 to 16 minutes (You're looking for 125 degrees inside this soon to be happy dead fish) Remove pan from heat and transfer salmon and lemon slices to paper towel-lined plate and tent loosely with foil.
3.       Return pan to high heat and simmer cooking liquid until slightly thickened and reduced to 2 tablespoons, 4 to 5 minutes. Remove pan from heat; whisk in butter and chives. Season with salt and pepper to taste.
4.       Season salmon lightly with salt and pepper. Using spatula, carefully tilt salmon fillets to remove lemon slices. Place salmon on serving platter or individual plates; spoon sauce over top and devour.

I just realized how absurd our instructions are for this class (I tried to condense, but left
a few because it is 1 in the morning and I just got done with a 14 hour day, yes, I'm lazy
now). It is kind of like when you go to McDonalds and it the coffee cup says "Contents
are Hot." No, shit.

Wednesday, April 20, 2011

Let's Kick This Off

Concerted look.
Welcome to Food Troll.  My name is Chris and this is part culinary school project, part personal project, and part just messing around and discussing the things that intrigue me about the culinary world and the craft.

Myself, I am an aspiring chef that has been trolling around kitchens since the age of 14 doing everything from hand scrubbing pans at a bakery to bleeding sweat on the line at various pubs and restaurants.  Food and cooking has always been a part of my life from when I used to sit in my Mother's kitchen as a boy crying about the stench of Bagna Cauda (I can tolerate it now) or helping her bake off hundreds of Biscotti.

I once thought that I wanted to teach, so in my early 20s I went to school and earned an English degree.  Within months of graduating the passion for the art died something horrific and my pen left the pad and my initial idea that I could teach someone art fizzled with the reality of the world in which we live (You can teach craft and inspire art, but teaching it and dealing with stuffy Literature types is not my gig).  The entire time through school I held odd jobs like cooking Irish food at a grimy Irish pub, tending bar at said grimy Irish pub, toiling on a line at the busiest "Upscale" Pub in the town, delivering sandwiches, managing said sandwich joint, tailoring tuxedos, working for a Congressman, and working in a psychology department.  Through it all I was always in some way affiliated with a business that provided food to the general public.

Night View of The New Culinary Institute
So, fast forward to the present and I now reside in the great flat plain of Nebraska.  After a year of trying to find a job with my all-but-useless English degree and working 60 hour weeks at the "oldest" Brew Pub in Nebraska I decided that it was time to take my life where I should have taken it ten years ago.  Enter Metropolitan Community College and their brand spanking new facilities and subtly renowned culinary program.  You say, Community College Culinary Program, pshhhh.  Well, surprisingly, this growing program is one of the best resources available in the middle of this country to pursue the culinary arts. I'll get into the school in a later post, but let's just say it has everything that one would need to gain proper training for a fraction of what it would cost to go to Johnson Wales, CIA, or like schools.

Here I stand now, just finishing my first full quarter at the Culinary Institute, and starting this little blog.  I hope to impart my experiences both in the professional kitchen I work at now, Toast, and do whatever I can at the school itself.  You'll find that I still have some of the teacher in me and I am more than willing to show the process of  recipes and dishes, the process of thought, ideation, etc. that goes into what I do.  In time, I hope this site to be a resource for home cooks, culinary students, professional chefs to entertain themselves with and possibly learn a thing or two.   Just bear with my photo taking abilities as that is something I'm learning as well.  I welcome you all to this little corner of the web and hope to engage in fruitful discussions about all things culinary.  Feel free to comment, suggest, criticize, analyze, or plain old say hi.  Try to keep it clean. I'm all for free speech but I would prefer to provide an environment where discussion, learning, and even criticism is done with some tact and respect for the individuals involved.